
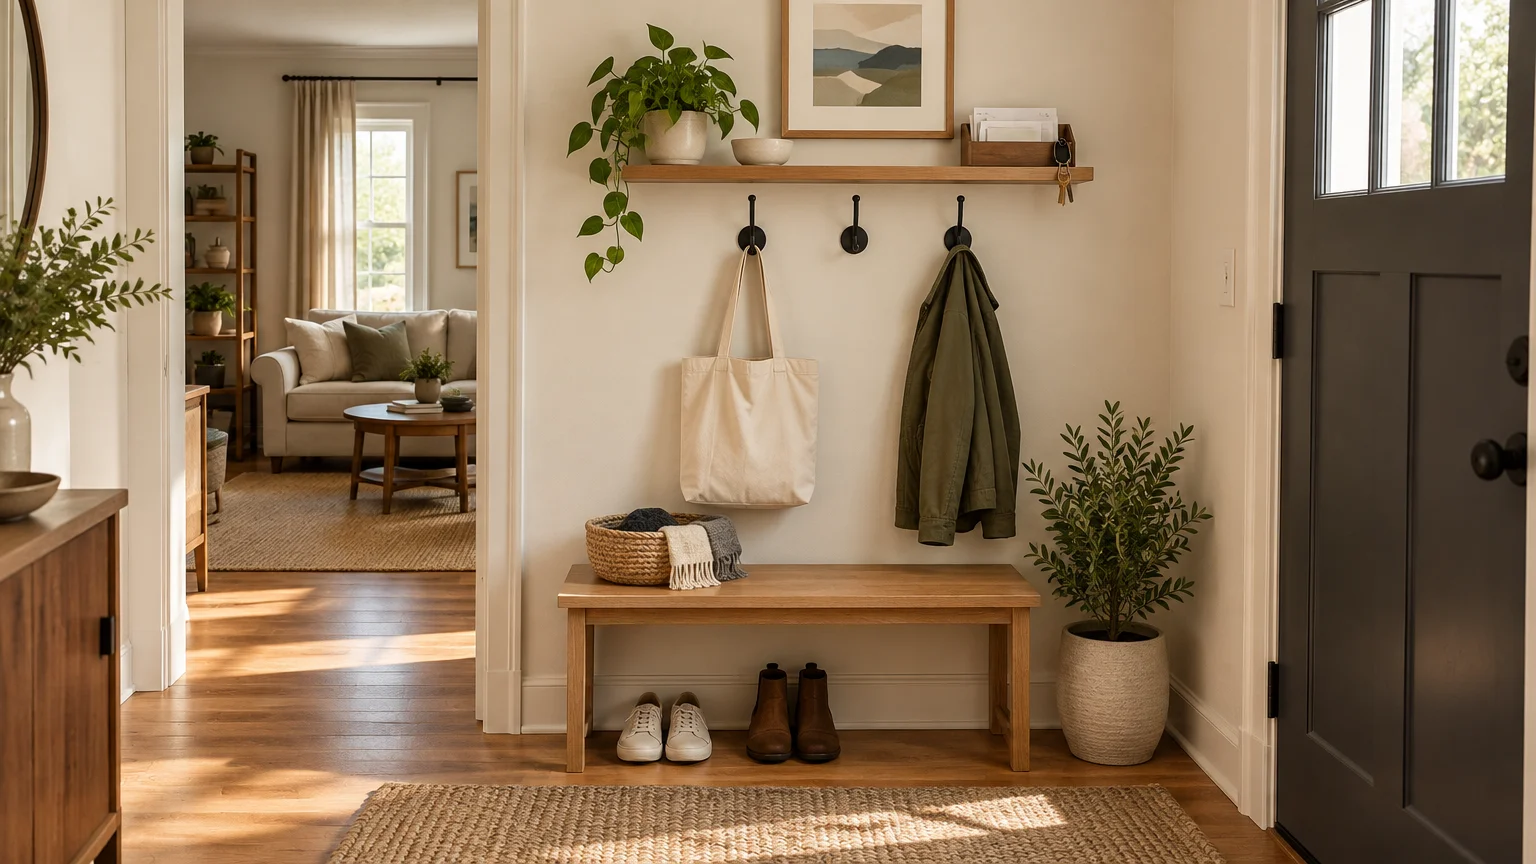
TLDR: Build your drop zone beside the door your household actually uses. Preserve the walking path first, then give daily shoes, bags, keys, current mail, and outgoing items separate, limited homes. A narrow entry may need only wall hooks, a key tray, and shallow shoe storage; a wider foyer can support a bench. Test the setup for one week before buying extra containers.
Good entryway drop zone organization is not about fitting a miniature mudroom into every house. It is about containing the handful of things that otherwise land on the floor, kitchen counter, or nearest chair. The most effective setup is usually a small one: hooks for the bags in active use, space for the daily shoe rotation, a landing spot for keys, and a simple way to separate incoming mail from items that need to leave the house.
Start with your household’s actual arrival routine rather than a staged picture of a foyer. If everyone enters through the garage or side door, that is where the primary drop zone belongs. The front entry can remain simpler and more decorative. Storage placed by the “official” entrance will not help if no one uses it.
Measure the entry before choosing storage
Measure the wall and the route through the room before shopping for a bench, hall tree, or cabinet. Record the usable wall width, baseboard depth, door swing, nearby outlets and switches, and the narrowest part of the walking path. Open the door fully while measuring; a slim cabinet is not useful if it prevents the door from opening properly.
Try to preserve a comfortable, continuous route instead of filling every available inch. The U.S. Access Board’s accessible-route guidance uses 36 inches as its general continuous clear-width benchmark, with limited exceptions for short 32-inch pinch points. That is accessibility guidance rather than a universal rule for every private residence, but it offers helpful context when you are deciding whether a bench makes a narrow hall too tight.
- Measure the clear wall width between trim, doors, and furniture.
- Mark the full door swing on the floor with removable painter’s tape.
- Measure the remaining walking width after accounting for the proposed storage depth.
- Note baseboards, vents, outlets, switches, and thermostat controls.
- Check whether drawers, cabinet doors, and baskets can open without blocking the route.
- Confirm that wall hooks will not leave hanging bags projecting into a busy doorway.
For a reality check, compare the depth of any proposed furniture with a product that publishes complete measurements. IKEA lists its HEMNES shoe-storage bench at 33½ inches wide, 12⅝ inches deep, and 25⅝ inches high, with room for about seven pairs. Its relatively shallow footprint shows what an entry bench can look like, but those dimensions are a product example—not a standard every entry should follow.
Choose a drop-zone layout that fits the route
| Entry condition | Best starting layout | What it handles |
|---|---|---|
| Narrow hall or apartment landing | Wall hooks, slim key ledge, and shallow shoe storage | Keys, two or three active bags, daily shoes, and outgoing mail |
| Typical foyer wall | Shoe bench with hooks or a rail above it | Shoes, bags, coats, and a place to sit |
| Busy family entrance | Individual hooks plus assigned baskets or cubbies | Backpacks, outerwear, sports accessories, and shoes |
| Entrance with almost no wall space | Over-door storage or one compact landing tray in the next room | Keys, mail, dog gear, and other small essentials |
| Large mudroom or garage entrance | Anchored lockers, cabinets, or a hall tree with overflow storage nearby | A larger daily rotation without exposing every item |
A bench is worthwhile when someone regularly sits to put on shoes and there is enough room to pass it comfortably. Otherwise, skip it. Wall-mounted hooks and a slim shoe cabinet can provide the useful parts of a drop zone without consuming as much floor area.
If you do want seating, check both dimensions and load information for the exact model. For example, IKEA lists its NIPÅSEN shoe-storage bench at 31⅛ inches wide, 13¾ inches deep, and 20½ inches high, with a tested maximum load of 220.5 pounds. Those specifications apply to that product only, but they illustrate why it is better to verify a bench than to assume every shoe cabinet can safely double as a seat.
Build the system around one normal weekday
Before purchasing organizers, watch what enters the house on an ordinary day. Make a quick list of shoes, backpacks, handbags, coats, keys, mail, reusable shopping bags, dog leads, and items waiting to be returned. Then decide which things genuinely need to remain near the door.
The goal is not to store every coat or pair of shoes in the entry. Keep the current rotation there and move off-season or occasional items elsewhere. A useful starting boundary might be one hook per person, one active bag per hook, and two or three pairs of daily shoes per person. Adjust that number to your household and available space rather than treating it as a universal formula.
Give each category a physical boundary
- Keys: one small tray, bowl, or set of hooks close to the door.
- Bags and backpacks: sturdy hooks or cubbies that keep straps off the floor.
- Shoes: a rack, cabinet, tray, or basket sized for the daily rotation.
- Incoming mail: one upright sorter or tray, not an unlimited pile.
- Outgoing items: one tote, basket, or wall pocket for returns and errands.
- Small accessories: a lidded container for sunglasses, gloves, or dog-walking supplies.
Physical limits do more work than ambitious organizing rules. When the shoe rack is full, something must move to longer-term storage. When the incoming-mail slot fills, it is time to process it. That visible boundary keeps the drop zone from quietly expanding across the room.
Labels are most useful when they prevent a real mix-up: one basket per child, separate incoming and outgoing mail slots, or bins for hats and dog gear. You can order custom labels for baskets and bins when a coordinated, durable look suits the project, but simple handwritten labels are perfectly adequate while you test the system.
A worked plan for a 36-inch-wide apartment wall
Suppose you have a 36-inch-wide wall beside the entrance but cannot sacrifice much floor depth. Treat the wall as a vertical storage column rather than trying to squeeze in a full hall tree.
- Place a narrow shoe cabinet or tray at the bottom, after confirming that it leaves enough walking room and does not conflict with the door swing.
- Install a short hook rail above it for the bags used most often. Position it according to the users, bag length, wall construction, and manufacturer instructions rather than relying on a universal hook height.
- Add a small ledge or secure key hooks within easy reach, away from the door edge.
- Use one lidded basket for small seasonal accessories so the wall does not look visually busy.
- Mount one slim pocket or place one upright file on the cabinet for outgoing forms, returns, and mail that needs action.
This plan does not require every component to be exactly 36 inches wide. In fact, leaving a little open wall at the sides usually makes the arrangement look more intentional and reduces conflicts with trim. Before drilling, outline each piece with painter’s tape and hang an empty shopping bag from the proposed hook location. That simple mock-up reveals projection and clearance problems that a flat measurement can miss.
Install hooks and furniture for the real load
Backpacks and loaded handbags can be much heavier than decorative wall accessories, so installation is not the place to improvise. Match the fasteners to the wall material and the product instructions. IKEA’s TJUSIG wall-rack information, for example, says screws are sold separately because wall materials vary. That is a useful reminder that one anchor type does not work for every wall.
Removable adhesive hooks can work for lightweight items in rentals, but only within the directions and weight limit of the exact product. For the referenced small Command hooks, 3M instructs users to clean the surface with isopropyl rubbing alcohol, press the hook firmly for 30 seconds, and wait one hour before use. Other Command products may have different limits or preparation steps, so follow the package you actually buy.
Do not assume “removable” means compatible with every painted, papered, textured, or delicate surface. Check the manufacturer’s surface exclusions, your lease terms, and the condition of the finish before installation. For valuable bags or heavy backpacks, a properly installed rail may be a better choice than a small adhesive hook.
Anchor tall or top-heavy storage
Tall hall trees, lockers, and freestanding cabinets should be secured as directed by their manufacturers before you load them. The U.S. Consumer Product Safety Commission recommends anchoring furniture to help prevent tip-overs. This matters especially in an entry, where children may pull on drawers, people may tug bags from hooks, and open doors can shift the balance of a cabinet.
Make practical storage look intentional
Once the route and storage work, use a few visual choices to make the drop zone feel like part of the room rather than a collection of organizers. Repeat one finish—black hooks, pale wood, or brushed metal—and limit open containers to the things that look reasonably calm. Hide mismatched accessories in one or two opaque baskets.
A mirror can brighten the arrangement and provide a useful last check before leaving. A washable runner defines the entry, but it should lie flat and allow the door to move freely. If you are choosing one for a tight space, the same principles used to size a rug for a small room apply: preserve the route and use scale to make the area feel connected rather than chopped up.
Keep decorative objects restrained. One framed print, a mirror, or a small durable plant is usually enough because coats and bags already add color and shape. If your drop zone includes open cubbies or shelving, borrow the balance and negative-space ideas from this guide to styling open shelves without clutter. Empty space is useful here; it gives tomorrow’s mail and shopping bag somewhere to land without immediately making the area look chaotic.
Common drop-zone mistakes to avoid
- Buying a bench before measuring the open door and walking route.
- Giving every possession a place at the entrance instead of limiting it to the daily rotation.
- Using hooks that are too weak, too close together, or installed with unsuitable hardware.
- Creating one shared basket for items that household members need to retrieve quickly.
- Letting incoming mail and outgoing returns share the same container.
- Adding decorative trays and baskets without assigning them a specific job.
- Ignoring wet shoes, dripping coats, or muddy sports gear when choosing materials.
- Expecting labels to fix a system that lacks enough hooks or has too many items.
Test the drop zone for one week
Set up the smallest workable version and use it for seven days. A tray from another room can stand in for a mail organizer, and painter’s tape can mark future hooks or furniture. Notice what still lands on the floor, what is awkward to reach, and whether anyone blocks the doorway while putting on shoes.
At the end of the week, make one or two corrections instead of expanding the whole project. You may need a stronger backpack hook, a separate return basket, or less shoe storage—not an elaborate built-in. Then schedule a five-minute weekly reset to remove old mail, relocate extra shoes, and return stray items to their proper rooms.
The best entryway drop zone organization protects the route through the home and makes the daily routine easier. Measure first, store only the active rotation, install everything for its real load, and add decorative polish after the system works. That modest sequence can make an ordinary entrance feel calmer without turning it into a renovation.
References
- Chapter 4: Accessible Routes
- HEMNES bench with shoe storage, white, 331/2×125/8×255/8" – IKEA
- NIPÅSEN bench with shoe storage, black, 311/8×133/4×201/2" – IKEA
- TJUSIG Hanger, white, 30 ¾" – IKEA
- IMPORTANT
Failure to follow instructions careful - Anchor It! | How to Anchor It! and protect children from furniture tip-overs | CPSC.gov