
TLDR
For a convincing bathroom makeover without renovation, concentrate on what you see and touch every day: the shower curtain, bath mat, towels, counter, storage, paint, and small hardware. Fix moisture or maintenance problems first, choose one clear color direction, and update the largest visual elements before buying accessories. The room should end up calmer and easier to use—not simply fuller of new things.
A dated bathroom rarely needs every finish disguised. It usually needs less visual noise, one stronger focal point, and better places for daily necessities. That is good news: you can create a substantial change without moving plumbing, replacing tile, or opening a wall.
Start by separating decorating from maintenance
A cosmetic refresh is appropriate when the bathroom is functional and its surfaces are sound. Pause the project if you find an active leak, soft or swollen material, recurring mold, peeling caused by persistent dampness, or a ventilation problem. The EPA advises fixing moisture problems, drying affected materials, and avoiding paint or caulk over moldy surfaces. It also recommends using an exhaust fan or opening a window while showering to help control moisture. Its guide to mold and household moisture is a useful starting point when you are unsure whether a stain is merely cosmetic.
This checkpoint is not the glamorous part of a makeover, but it protects everything that follows. Fresh paint and attractive baskets cannot solve damp drywall or a leaking supply connection.
Audit the room before shopping
Clear ten minutes and look at the bathroom as though you were entering it for the first time. Take a quick photo from the doorway; visual clutter is often easier to spot in a photograph than while standing in the room.
- Identify the largest tired-looking element: often the shower curtain, wall color, vanity surface, mirror area, or floor.
- Notice what is creating visual noise, including half-used bottles, exposed backup supplies, mismatched containers, and too many small decorations.
- Write down where the routine breaks: towels land on the floor, skin-care products crowd the sink, or cleaning supplies topple under the vanity.
- Choose one existing feature worth keeping and coordinating with, such as warm beige tile, a chrome faucet, a wood vanity, or retro pink fixtures.
- Measure available wall, drawer, cabinet, and under-sink space before buying storage. Account for pipes, outlets, doors, and anything that must remain accessible.
Now pick a restrained direction. Warm neutral, cheerful vintage, crisp contrast, or soft spa-like can all work. The label matters less than consistency. Choose two main colors plus one metal or wood tone, then repeat them instead of introducing a new idea with every purchase.
Plan your bathroom makeover without renovation from largest to smallest
The order of work matters. A bold shower curtain can change the room more than six tiny countertop accessories, while removing clutter may improve it more than either. Start with the broad visual field and finish with details.
1. Make the shower curtain the focal point
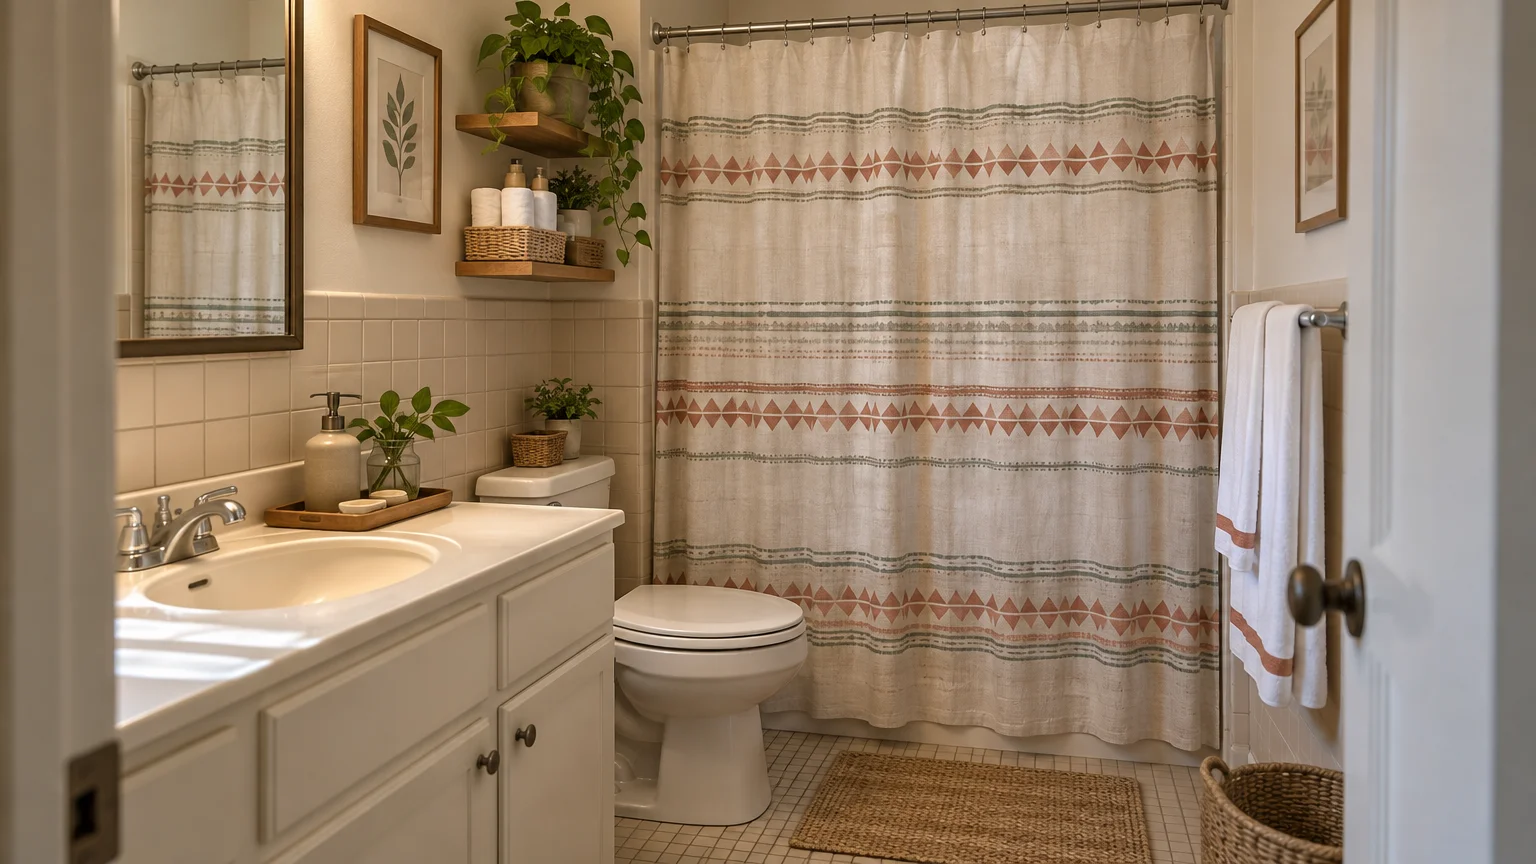
In a tub-and-shower bathroom, the curtain is often one of the largest uninterrupted surfaces. Choose a solid color, broad stripe, or medium-scale pattern that relates to the tile. Hang it neatly, replace visibly worn rings if needed, and keep the liner on the wet side. If the room already has patterned tile, I would usually choose a quieter curtain rather than make the two patterns compete.
2. Coordinate with dated tile instead of fighting it
Old tile looks most awkward when everything around it belongs to a completely different palette. Study its undertone. Cream or tan tile can feel deliberate beside warm white, olive, rust, or natural wood. Cool gray tile works more comfortably with white, charcoal, muted blue, or cool green. Pink, yellow, and blue vintage tile can become the room’s character when repeated once in a towel stripe, art print, or small tray.
Avoid buying a fully matched bathroom set. Repeating a color two or three times looks coordinated; repeating the same pattern on the curtain, mat, towels, and accessories can make a small room feel busy.
3. Decide whether paint is worth the effort
Paint can reset a bathroom when the walls dominate the view, but use a coating intended for the room’s conditions and follow its preparation, application, drying, and ventilation directions. Benjamin Moore, for example, markets Aura Bath & Spa for high-humidity interiors and describes it as mildew resistant; that is a manufacturer claim about that specific product, not a promise that paint will correct an underlying moisture problem.
Renters should obtain permission before painting. Homeowners should first determine why existing paint is peeling. If you have leftover paint afterward, keep it in its original labeled container and check local disposal options; PaintCare notes that accepted products and drop-off details vary by location.
4. Replace worn textiles as a group
A fresh bath mat and two useful towel colors can connect finishes that otherwise feel unrelated. Prioritize washable textiles that can dry properly in your room. One practical formula is a curtain in the main color, towels in a quieter related shade, and a mat close to the floor or vanity color. The result feels layered without becoming fussy.
Treat organization as part of the makeover
A beautiful bathroom still feels unfinished when the counter cannot support a normal morning. Sort the contents into daily use, weekly use, backup stock, cleaning supplies, guest items, and things that do not belong in the bathroom.
Keep only genuinely daily items on the counter. A small tray can contain soap and two or three routine products, but it should not become a parking lot for every bottle you own. Store weekly products in a drawer or shallow bin, backups together in a cabinet, and cleaning supplies in a safe location appropriate for your household.
- Use hooks where people tend to drop towels or robes. They are forgiving in a busy family bathroom.
- Use a towel bar when you have enough uninterrupted wall space and want towels to hang open.
- Add drawer dividers for small grooming items that otherwise migrate across the vanity.
- Choose handled bins for deep cabinets so items at the back remain reachable.
- Fit under-sink storage around the actual plumbing rather than buying a large organizer and hoping it works.
- Keep open baskets limited to attractive or frequently used items; hidden storage is better for colorful backup packaging.
Adhesive hooks and caddies can be useful where drilling is not permitted, but “removable” does not mean universally suitable. Product lines differ in compatible surfaces, moisture resistance, installation steps, cure time, and weight limits. Check the exact instructions before installation and loading. Command’s bathroom guidance specifically directs users to product-level surface and weight information and includes cautions for certain surfaces. If you are also considering labels or decorative decals, this guide to permanent versus removable sticker adhesive explains why surface and removal needs matter.
Choose small details that earn their space
Once the large surfaces and storage are settled, add one or two finishing moves. Frame appropriately placed art, restyle the mirror area, add a compact washable tray, or swap cabinet knobs if the change is permitted and reversible. Keep the original hardware in a labeled bag so it can be reinstalled later.
Decorative labels can make matching bins easier to identify, but use materials suitable for the intended surface and room conditions. Avoid covering required product information, vents, controls, grout that must breathe or dry, and areas exposed to direct water unless the product specifically supports that use.
Be cautious with generic peel-and-stick wall coverings or decorative tile sheets. Bathrooms combine humidity, cleaning products, and splash zones, and suitability varies by product and surface. Only install one when its manufacturer explicitly permits that environment and placement. A shower curtain, paint on an appropriate sound wall, or framed art outside a splash zone is often the lower-risk decorating move.
Compare the highest-impact updates
The impact descriptions below are editorial judgments, not tested performance ratings. Renter-friendliness also depends on the lease, installation method, and landlord approval.
| Update | Likely benefit | Renter-friendly? | Main watch-out |
|---|---|---|---|
| Edit the counter and cabinets | High visual and functional impact | Yes | Do not buy organizers until you measure |
| Change the shower curtain and bath mat | High visual impact | Usually | Choose washable materials suited to bathroom use |
| Add hooks, bins, or drawer dividers | High functional impact | Often | Verify mounting surface and load instructions |
| Paint sound walls | High visual impact | Permission dependent | Do not paint over mold or unresolved dampness |
| Swap cabinet knobs | Moderate visual impact | Permission dependent | Save the originals and match the existing holes |
| Add art or labels | Moderate finishing impact | Often | Keep materials away from unsuitable wet or humid locations |
A realistic weekend refresh for a compact dated bathroom
Imagine a small bathroom with beige tile, a brown vanity, chrome fixtures, and almost no closed storage. Instead of trying to disguise all four, make the beige and brown feel intentional.
- Check for leaks, damaged caulk, damp surfaces, or ventilation concerns before decorating.
- Empty the counter, vanity, and shower ledges. Discard or relocate what does not belong.
- Clean the room thoroughly, including the mirror, fixtures, cabinet fronts, and washable textiles.
- Choose warm white as the main color, muted olive as the accent, and keep the existing chrome consistent.
- Hang a warm-white shower curtain with a subtle olive stripe or border.
- Add solid olive or cream towels and a simple mat that does not compete with the tile.
- Place daily products on one compact tray. Move weekly products into a measured drawer divider.
- Add an appropriately mounted towel hook only if the selected product is approved for the surface and expected load.
- Finish with one small art piece outside the splash zone rather than several tiny decorations.
This plan does not pretend the tile is new. It edits the room until the existing finishes look like part of a palette rather than unrelated leftovers. Just as importantly, it improves where towels and products go.
Common mistakes that make a refresh feel unfinished
- Shopping before decluttering, which creates new storage for things you may not need.
- Trying to hide every dated feature instead of choosing one to work with.
- Using too many small accessories when one strong curtain or paint color would have more impact.
- Assuming any adhesive product will work on tile, painted walls, or humid surfaces.
- Putting paper prints, untreated wood, or unapproved adhesive coverings where they receive direct splashes.
- Mixing several competing metals, patterns, and accent colors in a small room.
- Decorating over peeling paint, recurring mold, failed caulk, or water damage.
Make the room calmer before making it newer
The best no-reno bathroom refresh changes the room’s hierarchy: fewer bottles catch your eye, the curtain becomes a deliberate focal point, textiles connect the existing finishes, and everyday items finally have sensible homes.
Start today by clearing the counter and taking one doorway photo. Then choose the single largest visual change and the single storage problem that causes the most daily friction. Solve those two things first. That is usually enough to make a bathroom feel intentional without allowing a decorating project to turn into a renovation.
References
- A Brief Guide to Mold, Moisture and Your Home | US EPA
- Aura® Bath & Spa Waterborne Interior Paint – Matte Gallon Lampblack CW-695 | Benjamin Moore
- Get the Answers to PaintCare's Frequently Asked Questions
- How to use Command™ Bathroom Solutions
- Have questions? Check out Command™ FAQs | Command™ Brand