
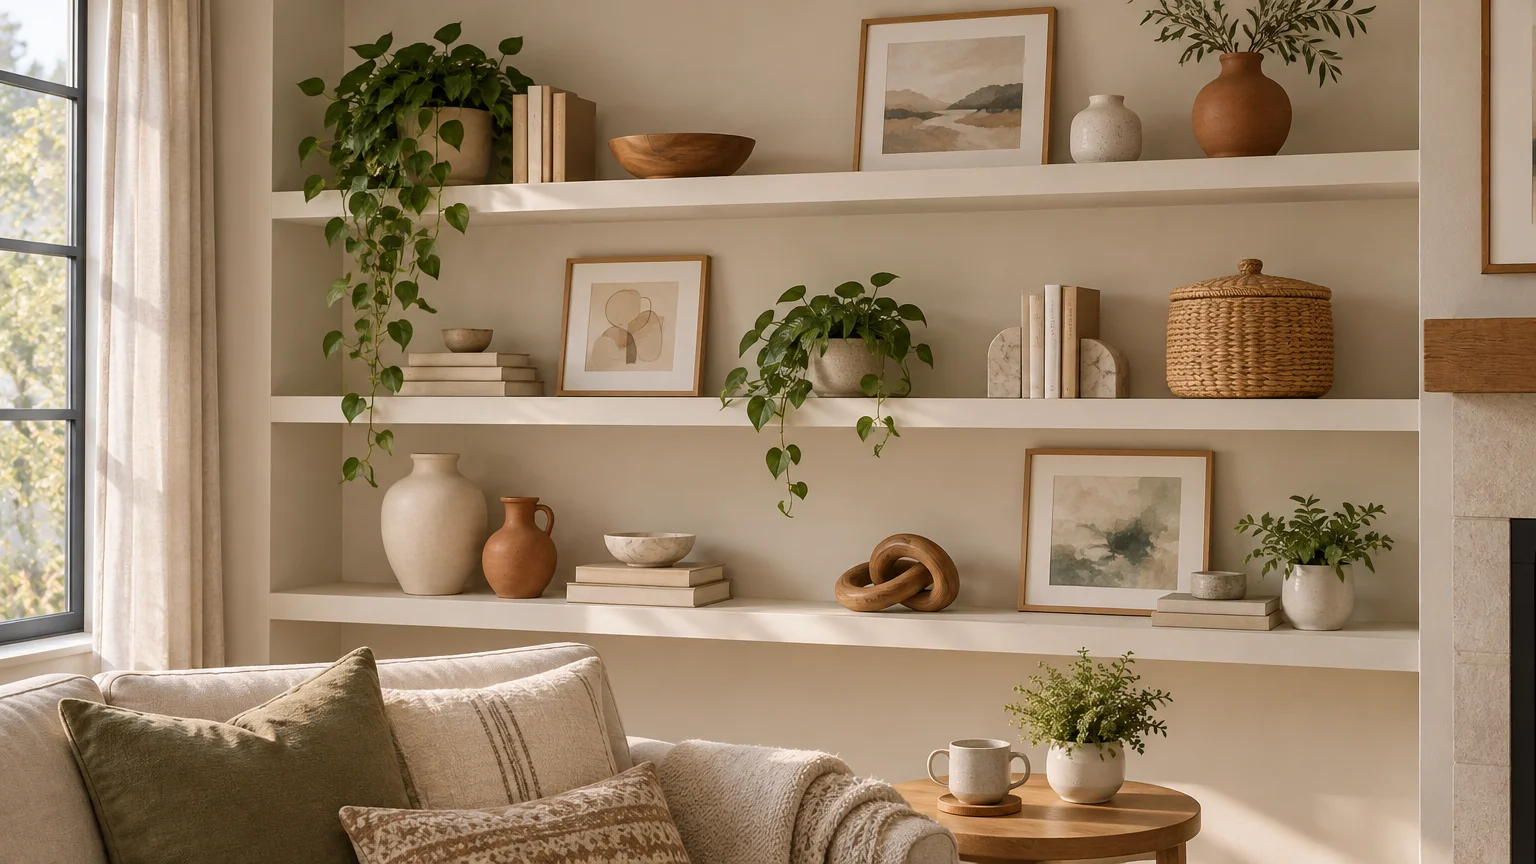
TLDR: The simplest answer to how to style open shelves is to treat each shelf as a series of small, edited groups. Begin with the objects you genuinely use or love, place the largest pieces first, repeat a few colors or materials, and leave deliberate gaps between groups. If the arrangement still feels busy, remove the smallest or least meaningful item rather than buying another container.
Open shelves tend to look cluttered when every object competes for attention. They look intentional when a few objects lead, smaller pieces support them, and the eye has somewhere to rest. You do not need matching décor, a shelf full of beige pottery, or a shopping trip. Books, framed art, useful bowls, plants, boxes, and personal collections can all work when their placement creates a clear rhythm.
How to style open shelves using five visual tools
Before moving anything, look at the entire shelving unit rather than one shelf at a time. You are creating one composition across several horizontal surfaces. A tall vase on the upper left can balance a stack of books on the lower right, while a repeated wood tone or color can connect objects that do not match.
Recent design guidance consistently emphasizes editing open storage, varying the size and height of objects, using containers for small necessities, and mixing useful pieces with decorative ones. These are flexible design tools, not mathematical rules for how many objects every shelf must contain. For additional examples of professionally curated arrangements, see these open-shelving tips from designers.
- Grouping: Arrange related objects as a small scene instead of scattering individual pieces evenly along the shelf. A short stack of books, a bowl, and a framed photo can read as one group.
- Negative space: Leave visible shelf surface around or between groups. Empty space is part of the arrangement, not evidence that you have failed to finish it.
- Scale: Mix large, medium, and small forms. One substantial vase usually creates a stronger starting point than several tiny accessories.
- Repetition: Repeat a color, shape, finish, or material in different parts of the unit. Three separate touches of black, for example, can connect a frame, a book spine, and a small vessel.
- Color control: You do not need a strict palette, but it helps to choose a dominant neutral or material plus a couple of recurring accent colors. Turn especially loud book spines inward only if you are willing to sacrifice easy identification; otherwise, relocate a few visually distracting books or break them into smaller stacks.
Start with function, not decoration
The best-looking shelves in real homes still have a job. Kitchen shelves hold dishes. Living-room shelves hold books and family objects. An entry shelf may need a basket for gloves or dog-walking supplies. Trying to hide every practical object can make a room feel staged, while displaying every practical object creates noise.
Empty the shelves if you can, then sort their contents into four loose categories: everyday-use items, decorative pieces, meaningful objects, and things that should live elsewhere. Everyday items deserve the easiest reach. Decorative and meaningful pieces can occupy the less convenient areas. Anything unrelated, duplicated, broken, or permanently ignored should not automatically return.
Containers are most useful when they quiet a collection of unattractive small items. Choose a basket, lidded box, file box, or opaque bin that fits comfortably on the shelf without scraping the shelf above. One appropriately sized container will usually look calmer than several little catchalls. Expert guidance similarly recommends using containers to manage small objects in open storage.
A step-by-step shelf styling method
- Choose a visual thread. Identify one or two colors or materials already present in the room, such as warm wood, white ceramic, black metal, blue, or brass. You are looking for repetition, not a perfectly matched set.
- Place the largest anchors. Start with framed art, substantial vessels, baskets, plants, or groups of large books. Distribute them across the shelving unit rather than putting every heavy-looking piece on the same side.
- Build smaller groups. Add one or two supporting objects near selected anchors. Try a vertical item beside a horizontal stack, or a rounded bowl next to a rectangular frame.
- Vary the silhouettes. Mix tall with low, solid with airy, and curved with straight. Avoid lining up five similarly sized objects as though they are waiting at a bus stop.
- Preserve useful access. Keep frequently used dishes, books, and supplies easy to lift without moving three decorative objects first.
- Step across the room. Shelf arrangements often look balanced up close but crowded from the doorway. Look for dark or busy patches and notice whether all the tall pieces have drifted to one side.
- Remove one thing from the busiest area. This final edit is often more effective than rearranging the entire display. Stop before every gap has been filled.
Do not worry about giving every shelf the same number of objects. Visual weight matters more than item count. A large dark planter can carry as much visual weight as a stack of books, a candle, and a small frame. Aim for balance across the full unit, not symmetry on every board.
What to change when the shelves still look wrong
| Problem | Likely cause | Practical fix |
|---|---|---|
| The shelves look cluttered | Too many small, unrelated objects or no clear gaps | Remove several small pieces, combine necessities in one container, and widen the space between groups. |
| The display looks too empty | Everything is small or pushed far apart | Add one larger anchor, enlarge a book stack, or lean a framed print behind a smaller object. |
| The shelves look flat | Most objects have the same height and shape | Introduce one tall vertical piece, one low horizontal stack, and a rounded form. |
| The arrangement looks overly matched | Colors, containers, and objects repeat too literally | Keep the palette but vary age, texture, shape, and material. Add one personal object that breaks the set. |
| The shelves are attractive but impractical | Décor blocks frequently used items | Move decorative pieces higher and give everyday items clear, reachable zones. |
| One side feels heavy | Large, dark, or visually dense pieces are concentrated together | Move one substantial object to the opposite side or lower shelf and reassess from the doorway. |
A worked example for three living-room shelves
Imagine three open shelves holding books, a small framed print, a plant, two ceramic vessels, a family keepsake, and a box of remote controls and charging cables.
On the top shelf, lean the framed print slightly off-center and place the smaller ceramic vessel in front of one lower corner. Leave the other side mostly open. That blank area gives the artwork enough importance to act as the upper anchor.
On the middle shelf, place several upright books toward one side and use a sturdy object as a bookend. Add the plant on the other side, allowing space between the books and foliage. If you want to display a small character or collectible, make it part of the book group rather than leaving it isolated in the middle. Our guide to adding mini-figures to home displays offers more ideas for incorporating tiny personal objects without letting them dominate the shelf.
On the bottom shelf, create a horizontal book stack with the family keepsake on top. Put the second ceramic vessel or the closed utility box toward the opposite side. The box keeps cables and remotes nearby without requiring them to become part of the visual composition.
Notice that the three shelves are not identical. The frame gives the top shelf height, the plant gives the middle movement, and the box gives the bottom shelf visual weight. Repeated book colors, ceramics, or wood tones make the separate arrangements feel related.
Adjust the method for different rooms
Shallow floating shelves
Shallow shelves work best with slim objects: small frames, paperback books, low vessels, and lightweight decorative pieces. Leaning art can add height without consuming much depth, but it should be stable and should not project into a busy walkway. Avoid forcing a basket or planter onto a shelf when its base does not sit fully and securely on the surface.
Kitchen open shelving
Let frequently used dishes do most of the decorating. Stacks of bowls, rows of glasses, mugs, and serving boards already create repetition. Keep everyday pieces within easy reach and reserve higher shelves for occasional serving ware or purely decorative objects. A small plant or framed print can soften the utility, but it should not make unloading the dishwasher harder.
Pantries, entryways, and craft spaces
Organization-heavy shelves need stronger categories and fewer decorative interruptions. Use similar containers where visual calm matters, then label only the items that are genuinely difficult to identify. In these spaces, custom labels or decorative stickers can add a personal visual detail to boxes or bins, but choose and apply any product according to its current material and surface instructions.
Keep labels short and consistent. A pantry does not need a label on a transparent jar of pasta, but opaque bins for baking supplies, party decorations, or craft scraps benefit from clear names. The objective is faster retrieval, not covering every container with another layer of visual information.
Decorate open shelves on a small budget
Shop your own rooms first. Move a framed photo from a crowded console, gather attractive hardback books, or repurpose a small bowl as a catchall. Removing dust jackets can reveal calmer book covers, although there is no reason to alter books you value as collectibles. A clipping in a simple frame, a branch in a bottle, or a child’s small piece of pottery can provide more personality than generic shelf décor.
If you do buy something, fill a specific gap. Purchase a large basket because you need concealed storage, not because an empty shelf made you nervous. Buy a frame for an artwork you already own rather than accumulating another tiny ornament. Open shelving usually improves through editing and redistribution before it improves through shopping.
Do not overlook shelf safety
Styling advice cannot determine whether a shelf is securely installed. Follow the instructions supplied with the actual shelf, including guidance about suitable fasteners, wall material, and load limits. IKEA’s wall-shelf instructions, for example, note that wall materials require different fasteners and that suitable hardware must be chosen for the wall. Decorative arrangements should remain within the manufacturer’s stated limits.
Freestanding bookcases and applicable shelving furniture may also need anchoring, especially in homes with children. The U.S. Consumer Product Safety Commission’s childproofing guidance advises securing furniture such as bookcases and shelves to help prevent tip-overs. Anchoring is a separate task from making the shelves look balanced, but it matters much more.
The easiest next step
Take a photo of your shelves from across the room, then identify the busiest section. Remove three unnecessary objects from that area. Return the largest pieces first, create two or three small groups, and leave at least one obvious gap where the eye can rest.
Live with the arrangement for a day before filling anything else. If the shelves hold what you need, reflect something personal, and do not make the room feel noisier, they are finished. Open shelves should look collected and useful—not packed, perfect, or frozen in place.
References
- How to use open storage without adding to clutter – The Washington Post
- 8 Ways to Tastefully Curate Your Open Shelving Like a Designer, According to the Pros Themselves
- Advice and Instructions
- Childproofing Your Home – Several Safety Devices to Help Protect Your Children from Home Hazards | CPSC.gov